Setting up Cursor for Swift Development
Cursor is a popular AI-native editor. It offers coding agents and AI-powered autocomplete.
Since Cursor is a fork of VS Code, the Swift VS Code extension works with Cursor. The extension includes:
- Syntax highlighting and code completion
- Code navigation features such as Go to Definition and Find All References
- Refactoring and quick fixes to code
- Package management and tasks with support for Swift Package Manager
- Rich support for debugging
- Testing with XCTest or Swift Testing frameworks
The Swift extension is designed to support the following projects:
- Swift Package Manager projects (for example, using
Package.swift) - Projects that can generate a
compile_commands.json(e.g. using CMake)
Install the Extension
- First, install Swift. If you do not already have Swift installed on your system, see the Getting Started Guide on Swift.org.
- Download and install Cursor.
-
Install the Swift extension from the Open VSX marketplace You can also install it from the Extensions pane in Cursor (⇧⌘X opens the pane;
Ctrl + Shift + Xif you’re not on macOS).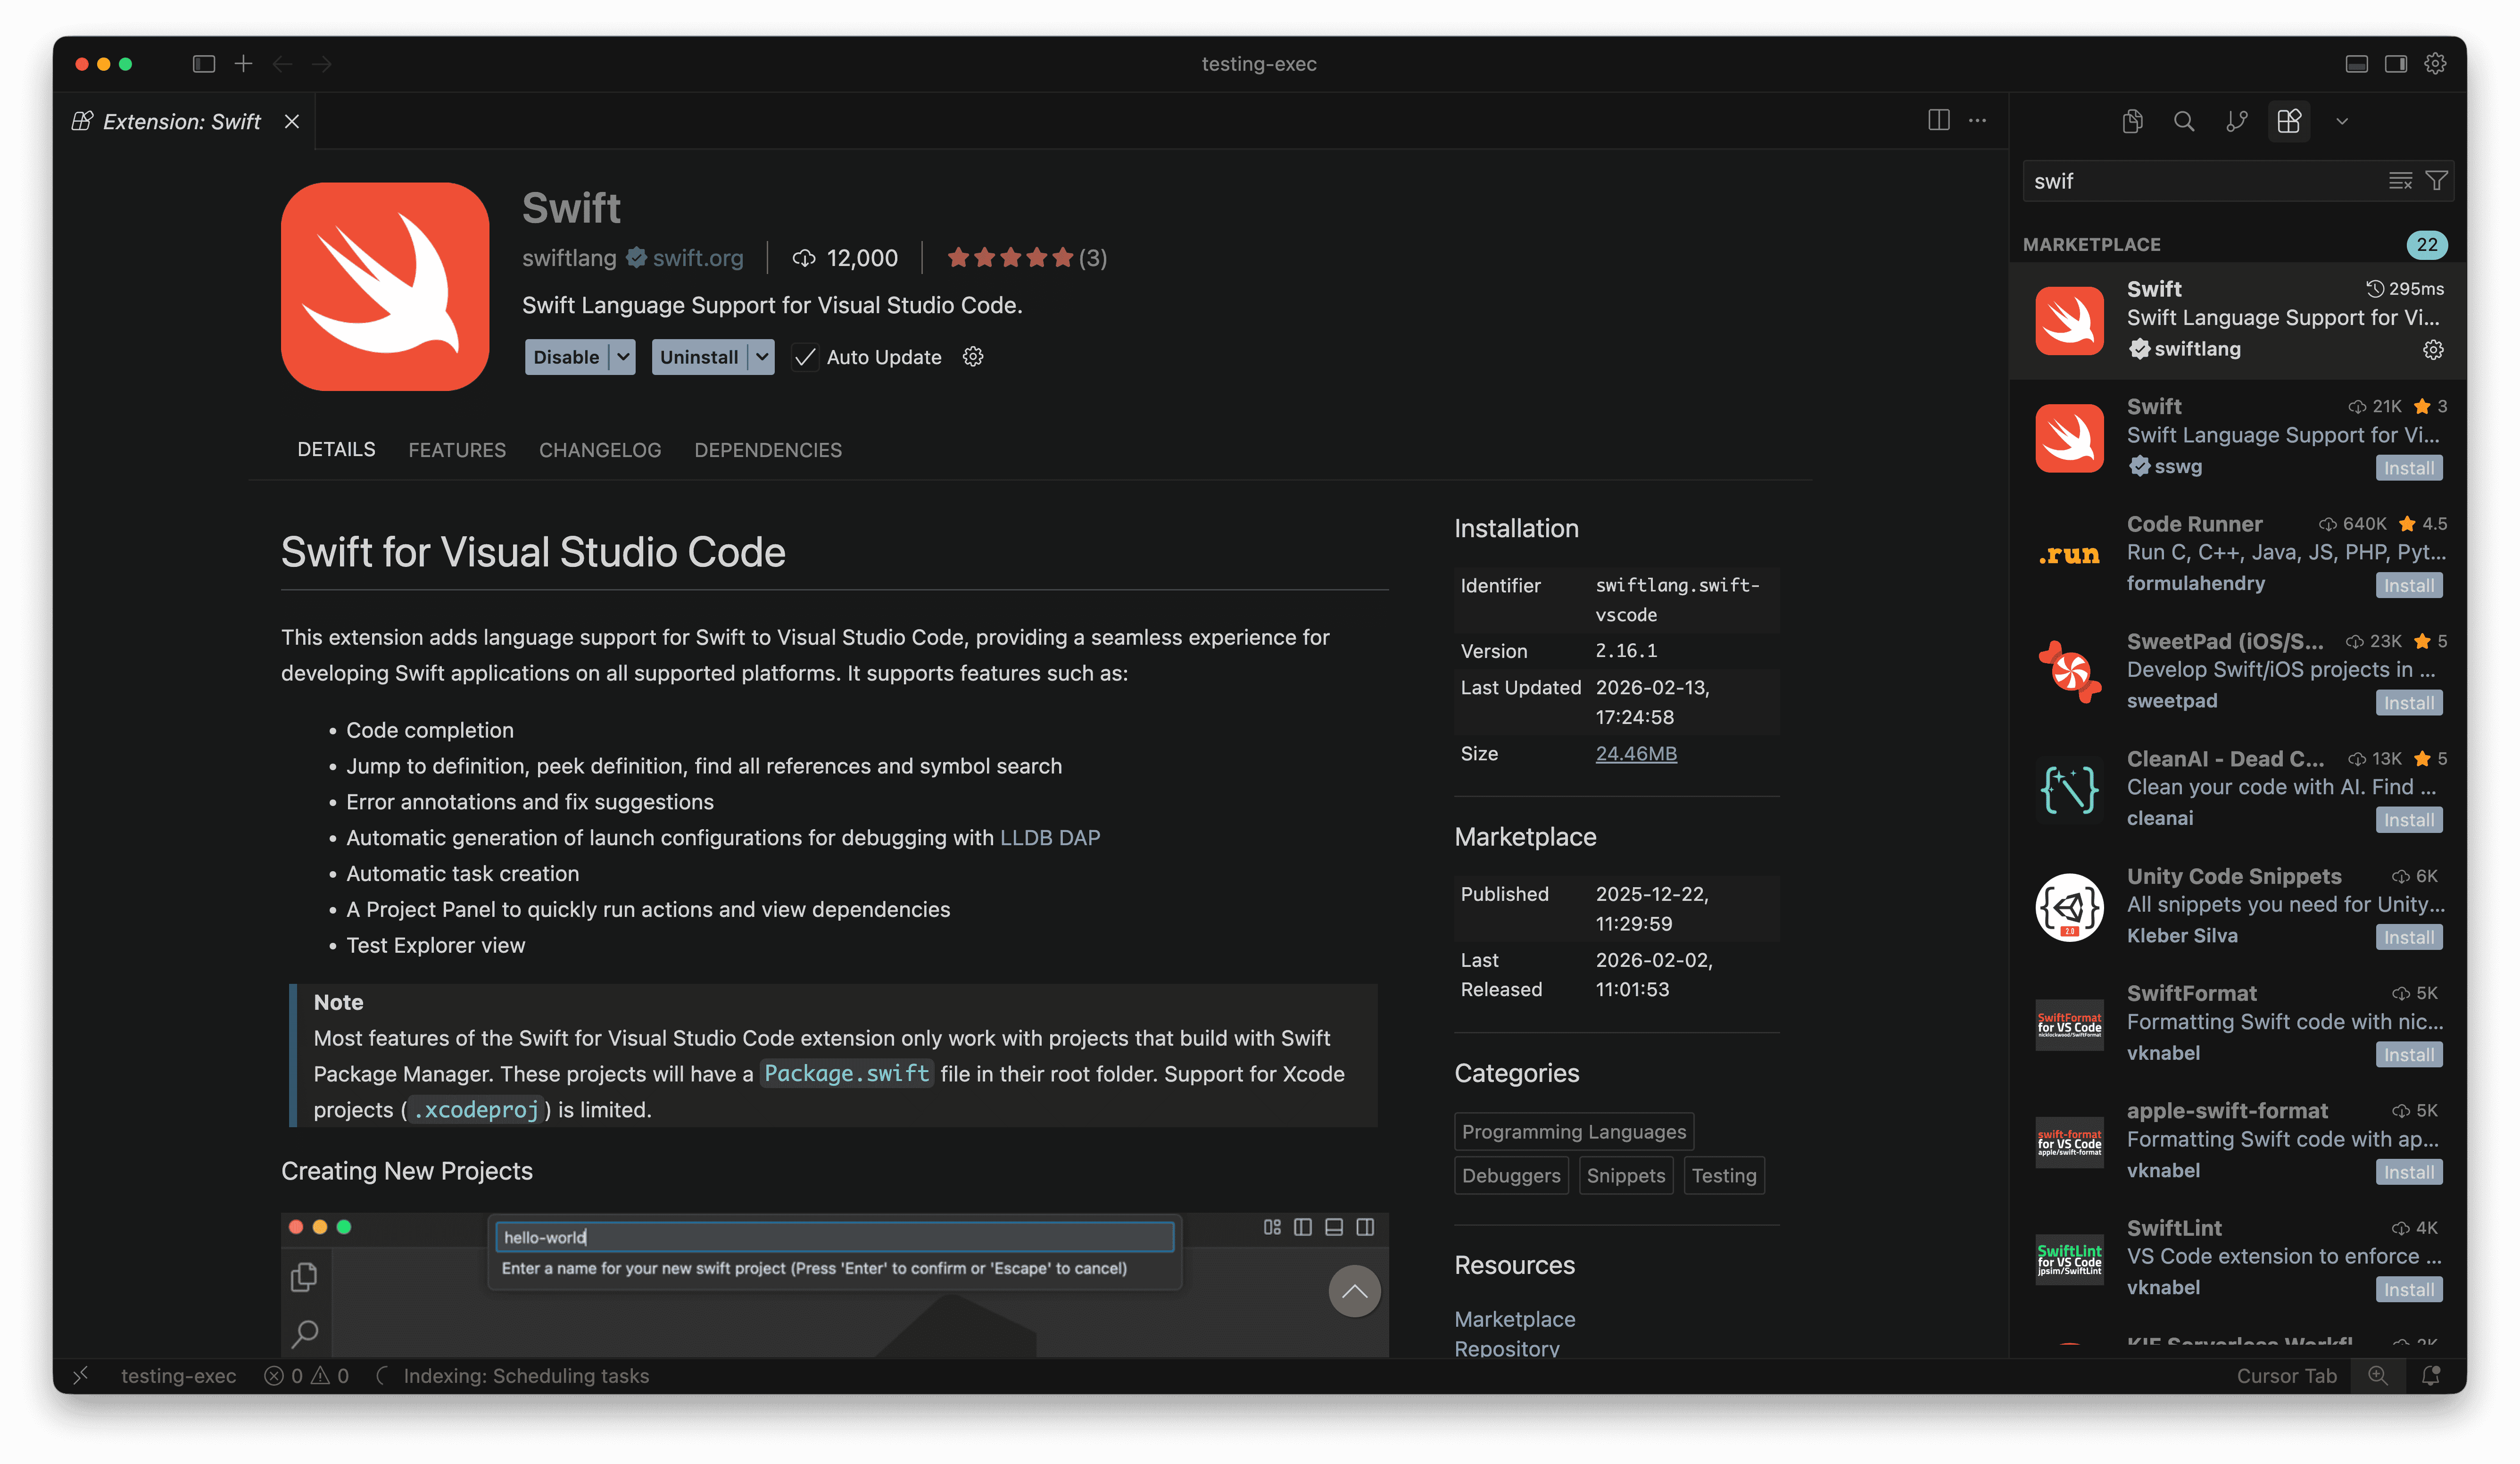
-
(Optional) Complete the onboarding steps. The extension includes steps on how to install Swift, and set up your development environment. Open the Command Palette (⇧⌘P on Mac;
Ctrl + Shift + Potherwise) and type inWelcome: Open Welcome Walkthrough, then selectGetting started with Swift.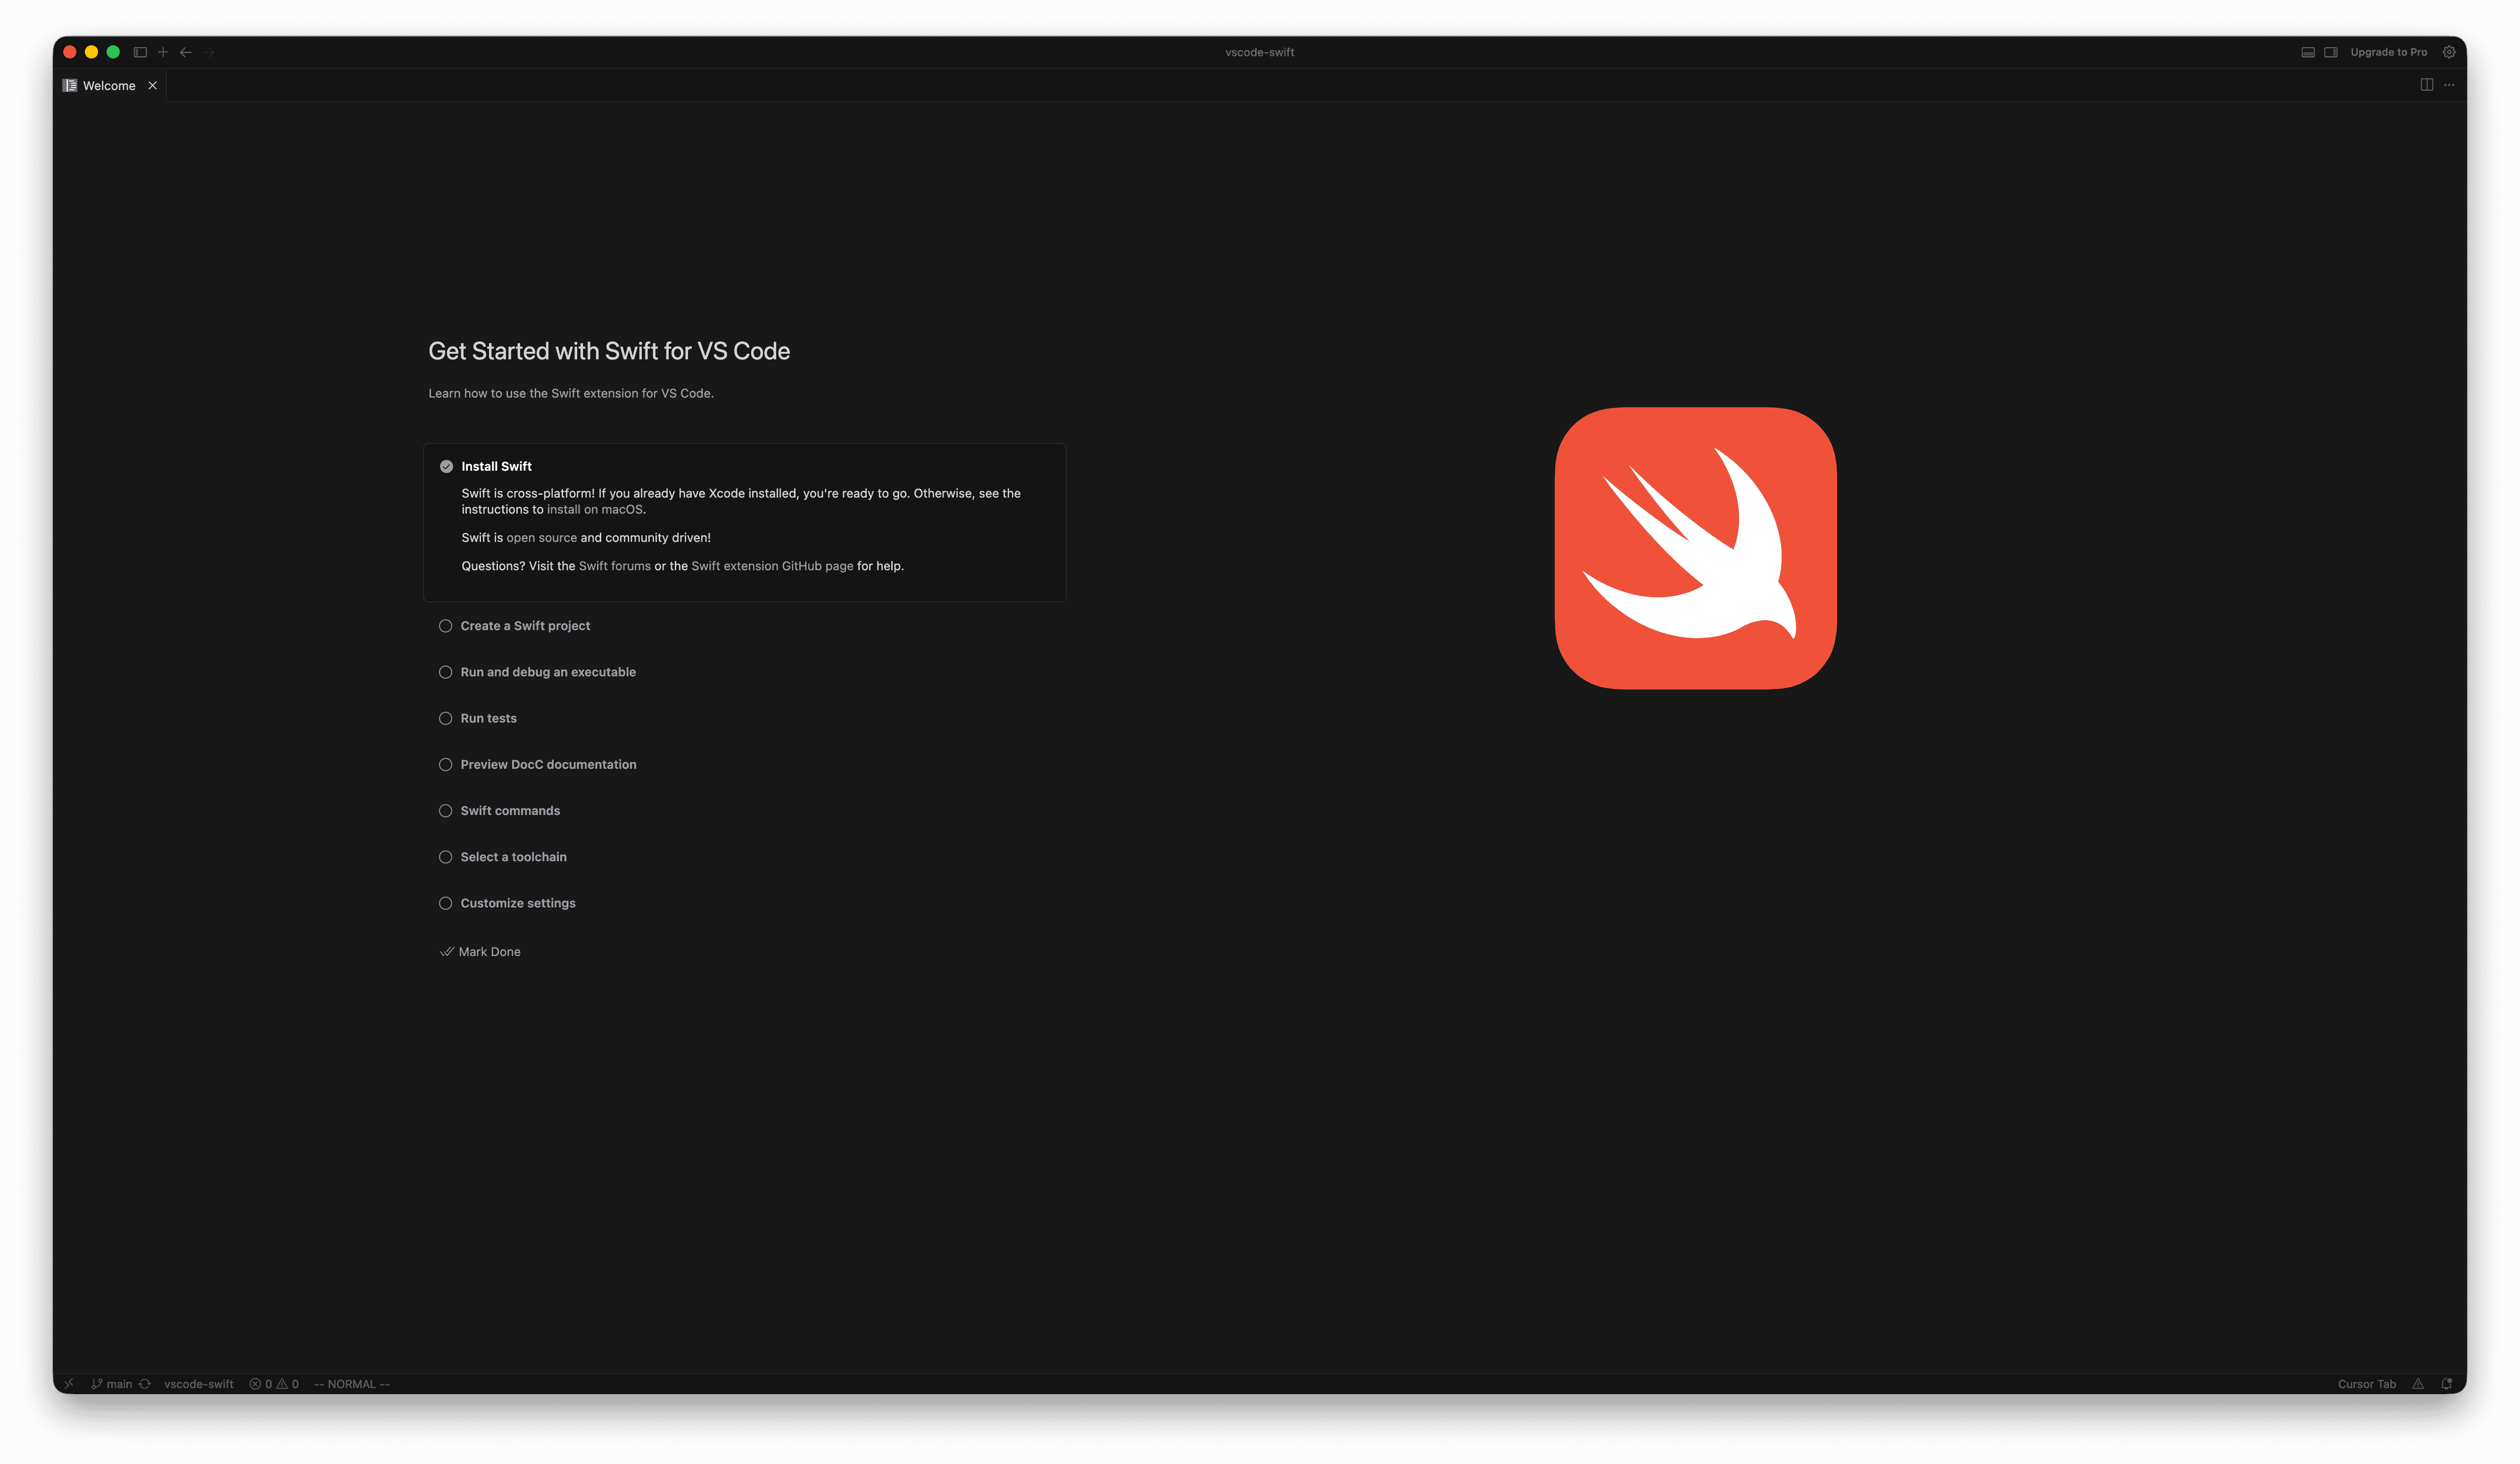
Create a New Swift Project
To create a new Swift project, use the Swift: Create New Project... command in
the Swift extension to guide you through the process.
To open the Command Palette to find and invoke this command, use the key combination to activate the palette:
- For macOS:
⇧⌘P - Other platforms:
Ctrl + Shift + P
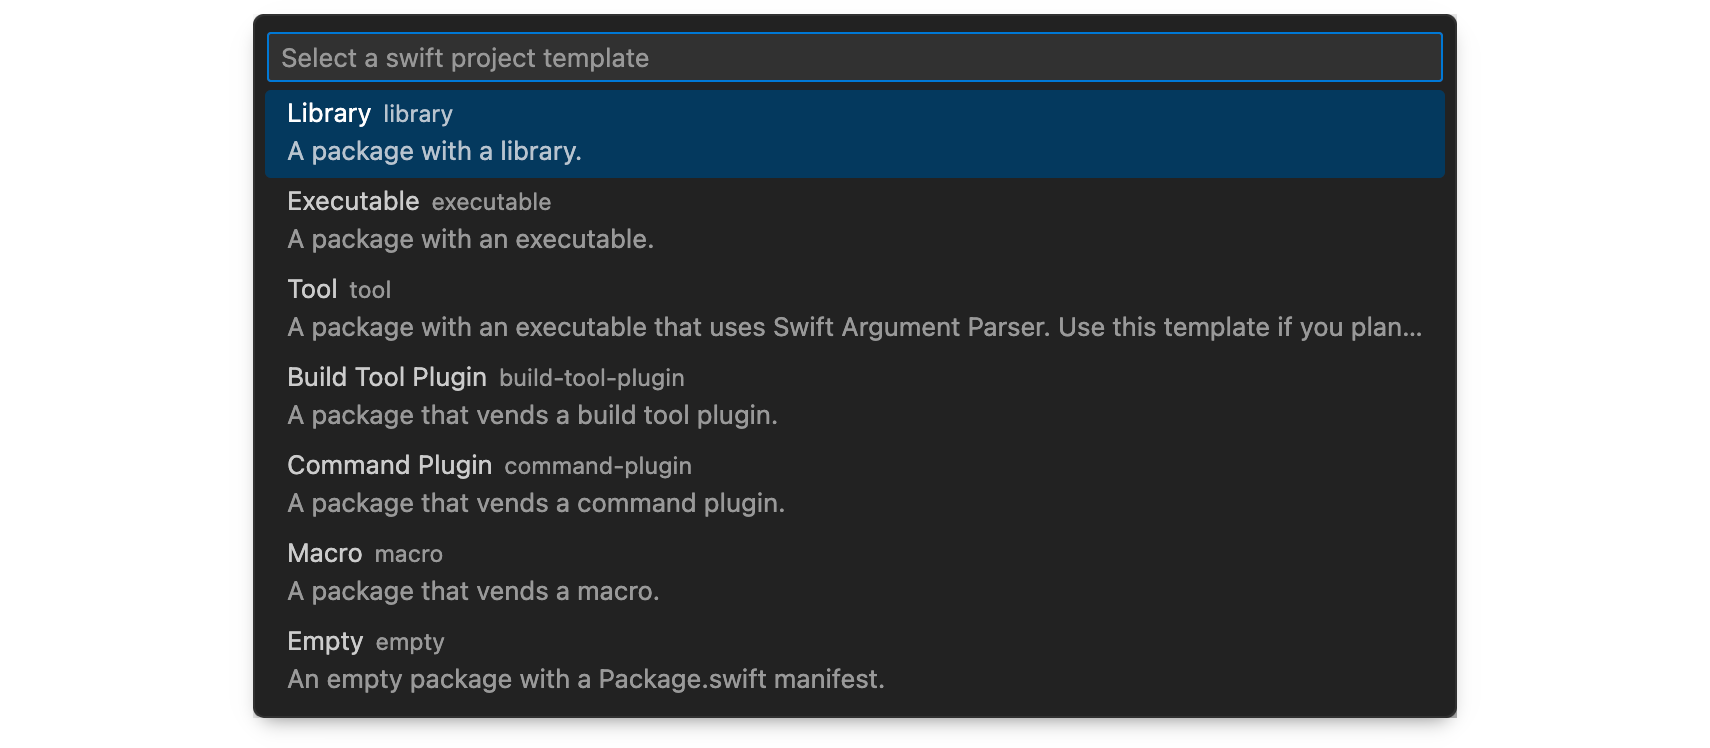
- In the command palette, search for the
Swift: Create New Project...command. - Choose the type of project to create from the list of templates.
- Choose the directory to store the project.
- Give your project a name.
- Open the newly created project. Cursor prompts you to open the project in
the current window, a new window, or add it to the current workspace. Configure the default behavior with the
swift.openAfterCreateNewProjectsetting.
Language Features
The Swift extension uses SourceKit-LSP to power language features. SourceKit-LSP provides the several features in the editor. Use these links to see the documentation for each topic:
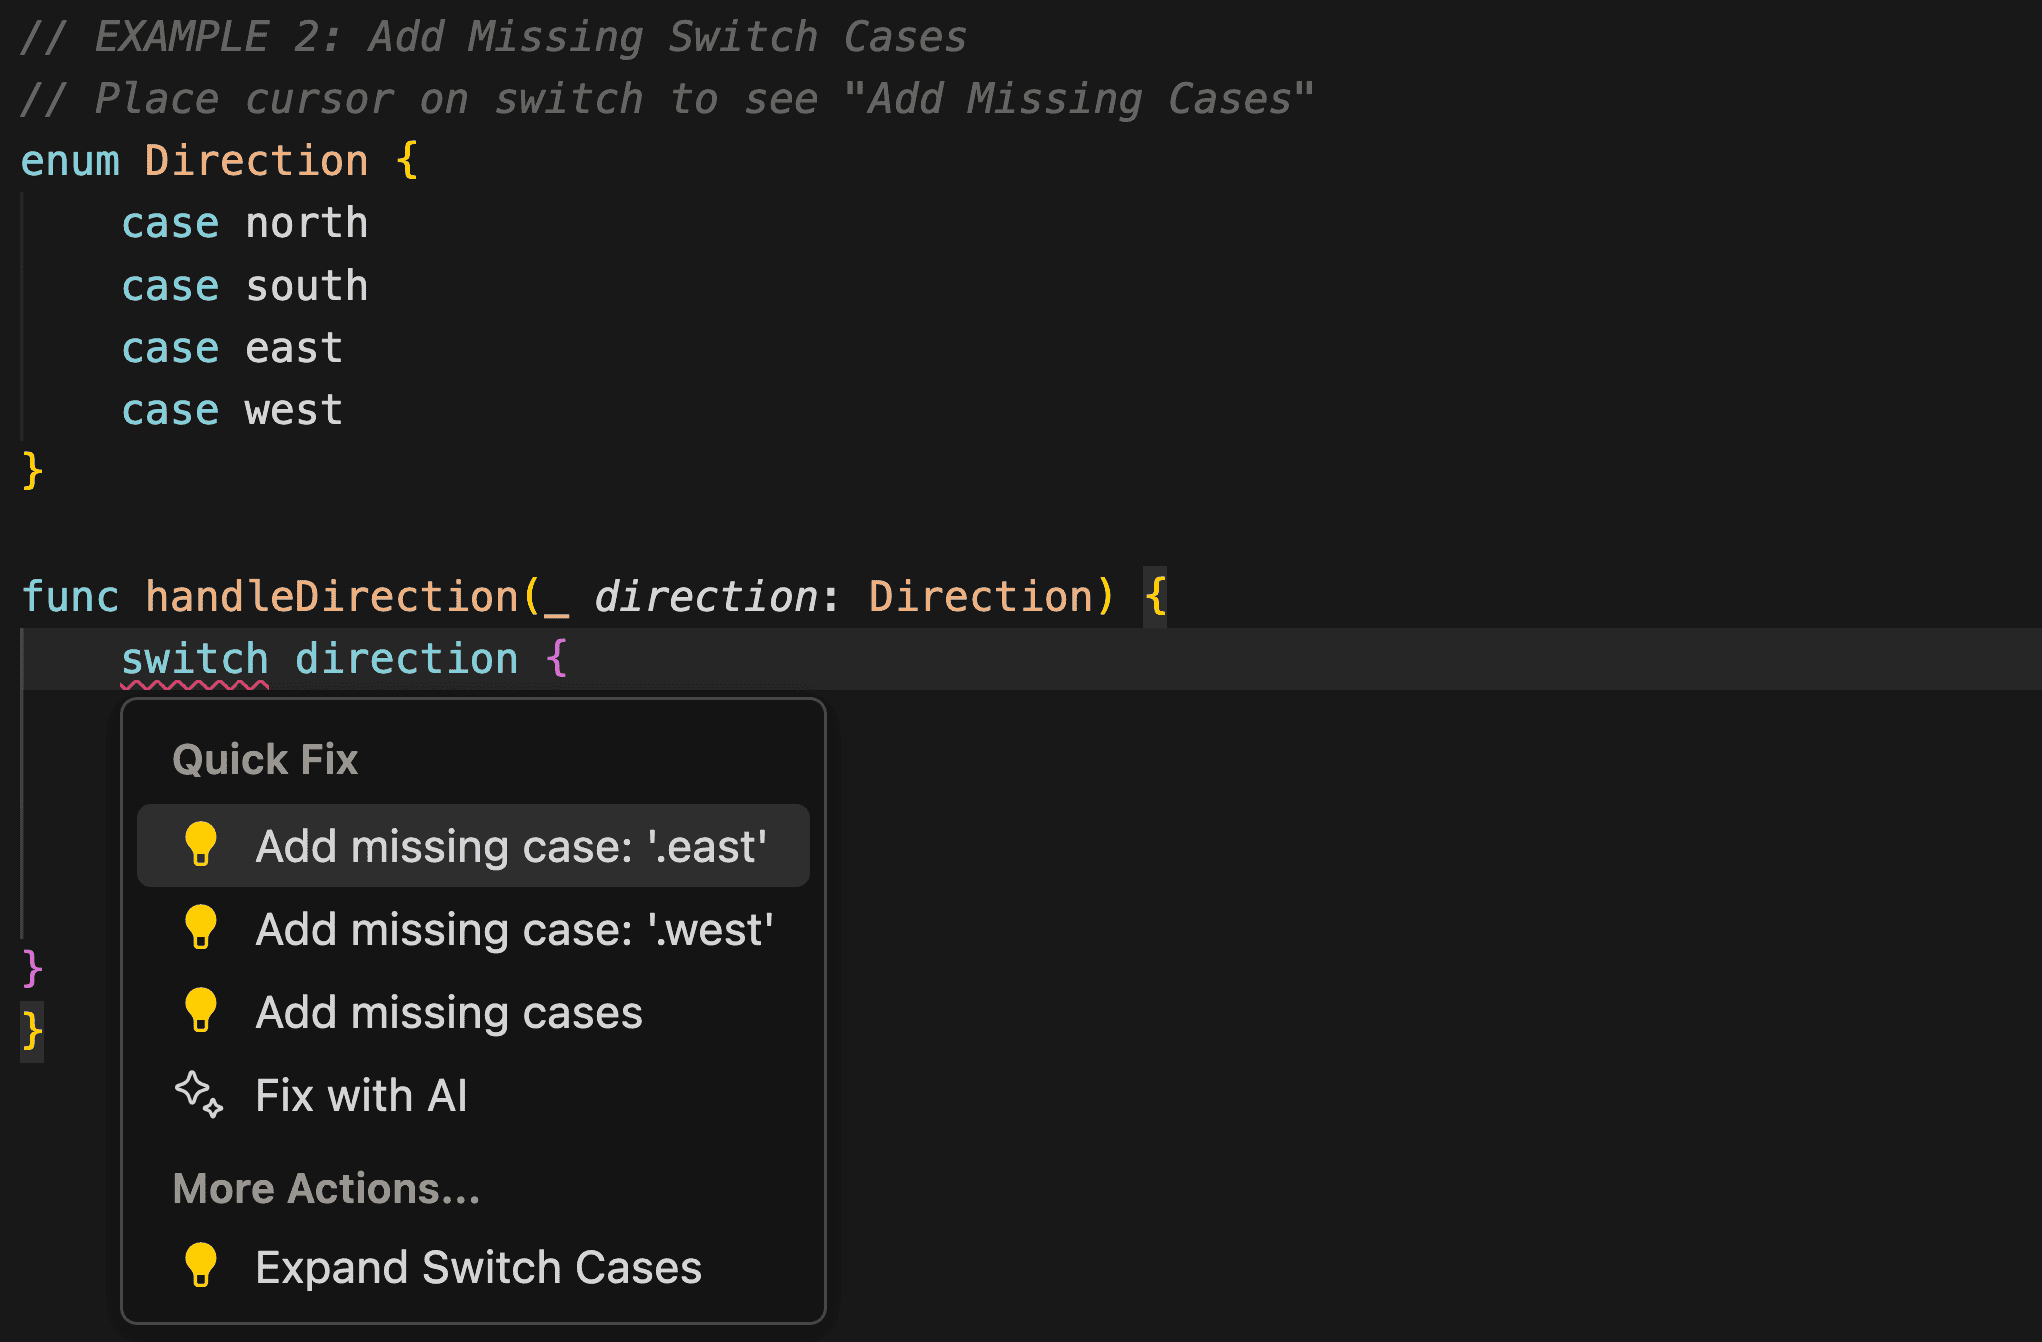
SourceKit-LSP also provides code actions to automate common tasks. ⌘ + . opens the code actions menu. The menu changes depending on where your cursor is. In this example, since the cursor is on an incomplete switch, the code action adds the missing switch case:
Code actions can include:
- Adding targets to your
Package.swift - Converting JSON to protocols
- Adding documentation to your functions
Prior to Swift 6.1 you must perform a swift build command on your project either
on the command line or using a task in Cursor to populate the index for SourceKit-LSP before language features can be used.
Swift Tasks
Cursor provides tasks as a way to run external tools. See the Integrate with External Tools via Tasks documentation to learn more.
The Swift extension provides some built-in tasks that you can use to build your project via
the Swift Package Manager. You can also configure custom tasks by creating a
tasks.json file in the root folder of your project. For example, this
tasks.json builds your Swift targets in release mode:
{
  "version": "2.0.0",
  "tasks": [
    {
      "type": "swift",
      "label": "Swift Build All - Release",
      "detail": "swift build --build-tests",
      "args": ["build", "--build-tests", "-c", "release"],
      "env": {},
      "cwd": "${workspaceFolder}",
      "group": "build"
    }
  ]
}
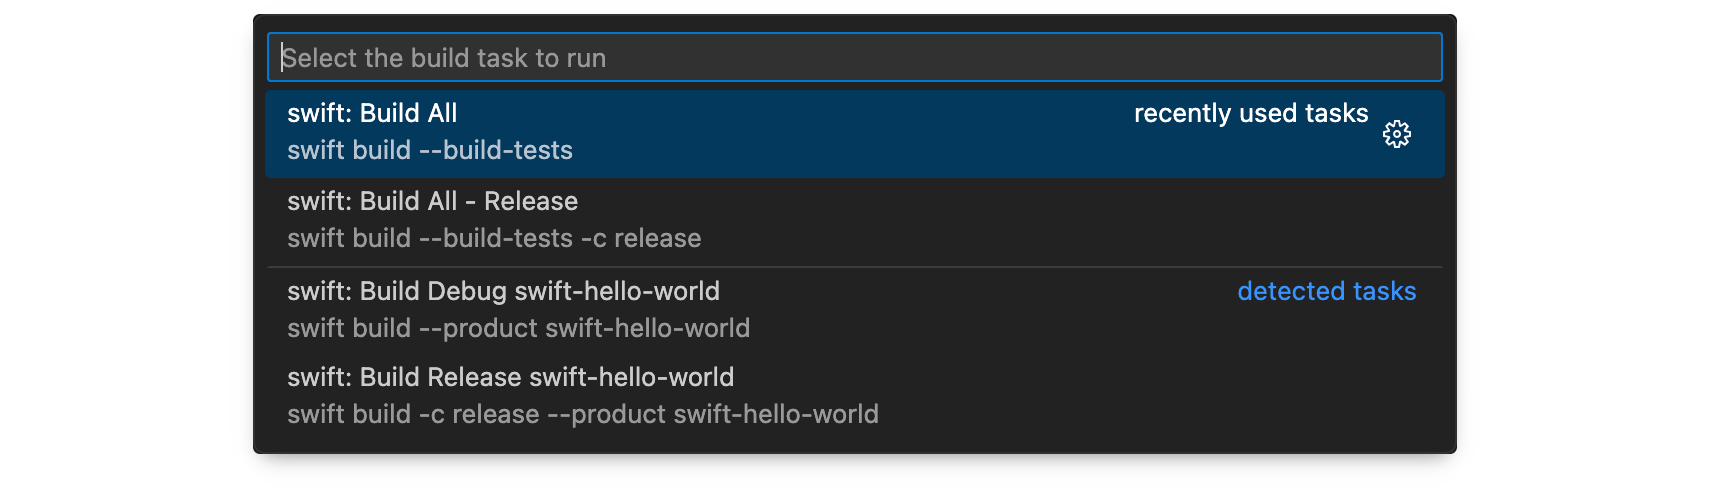
The above task is configured to be in the build group. This means it will
appear in the run build tasks menu that can be opened with ⇧⌘B
on macOS or Ctrl + Shift + B on other platforms:
Any errors that occur during a build appear in the editor as diagnostics alongside those provided by SourceKit-LSP. Running another build task clears the diagnostics from the previous build task.
Debugging
Cursor provides a rich debugging experience where the coding agent helps you to find the root cause of your bug. See the debugging documentation for more information.
The Swift extension relies on the LLDB DAP extension to enable debugging support.
By default, the extension creates a launch configuration for each executable
target in your Swift package. You may configure these yourself by adding a
launch.json file to the root folder of your project. For example, this
launch.json launches a Swift executable with custom arguments:
{
  "configurations": [
    {
      "type": "swift",
      "name": "Debug swift-executable",
      "request": "launch",
      "args": ["--hello", "world"],
      "cwd": "${workspaceFolder}",
      "program": "${workspaceFolder}/.build/debug/swift-executable",
      "preLaunchTask": "swift: Build Debug swift-executable"
    }
  ]
}
You can launch a debugging session via the Debug view in Cursor.
- Select the launch configuration you wish to debug.
- Click on the green play button to launch a debugging session.
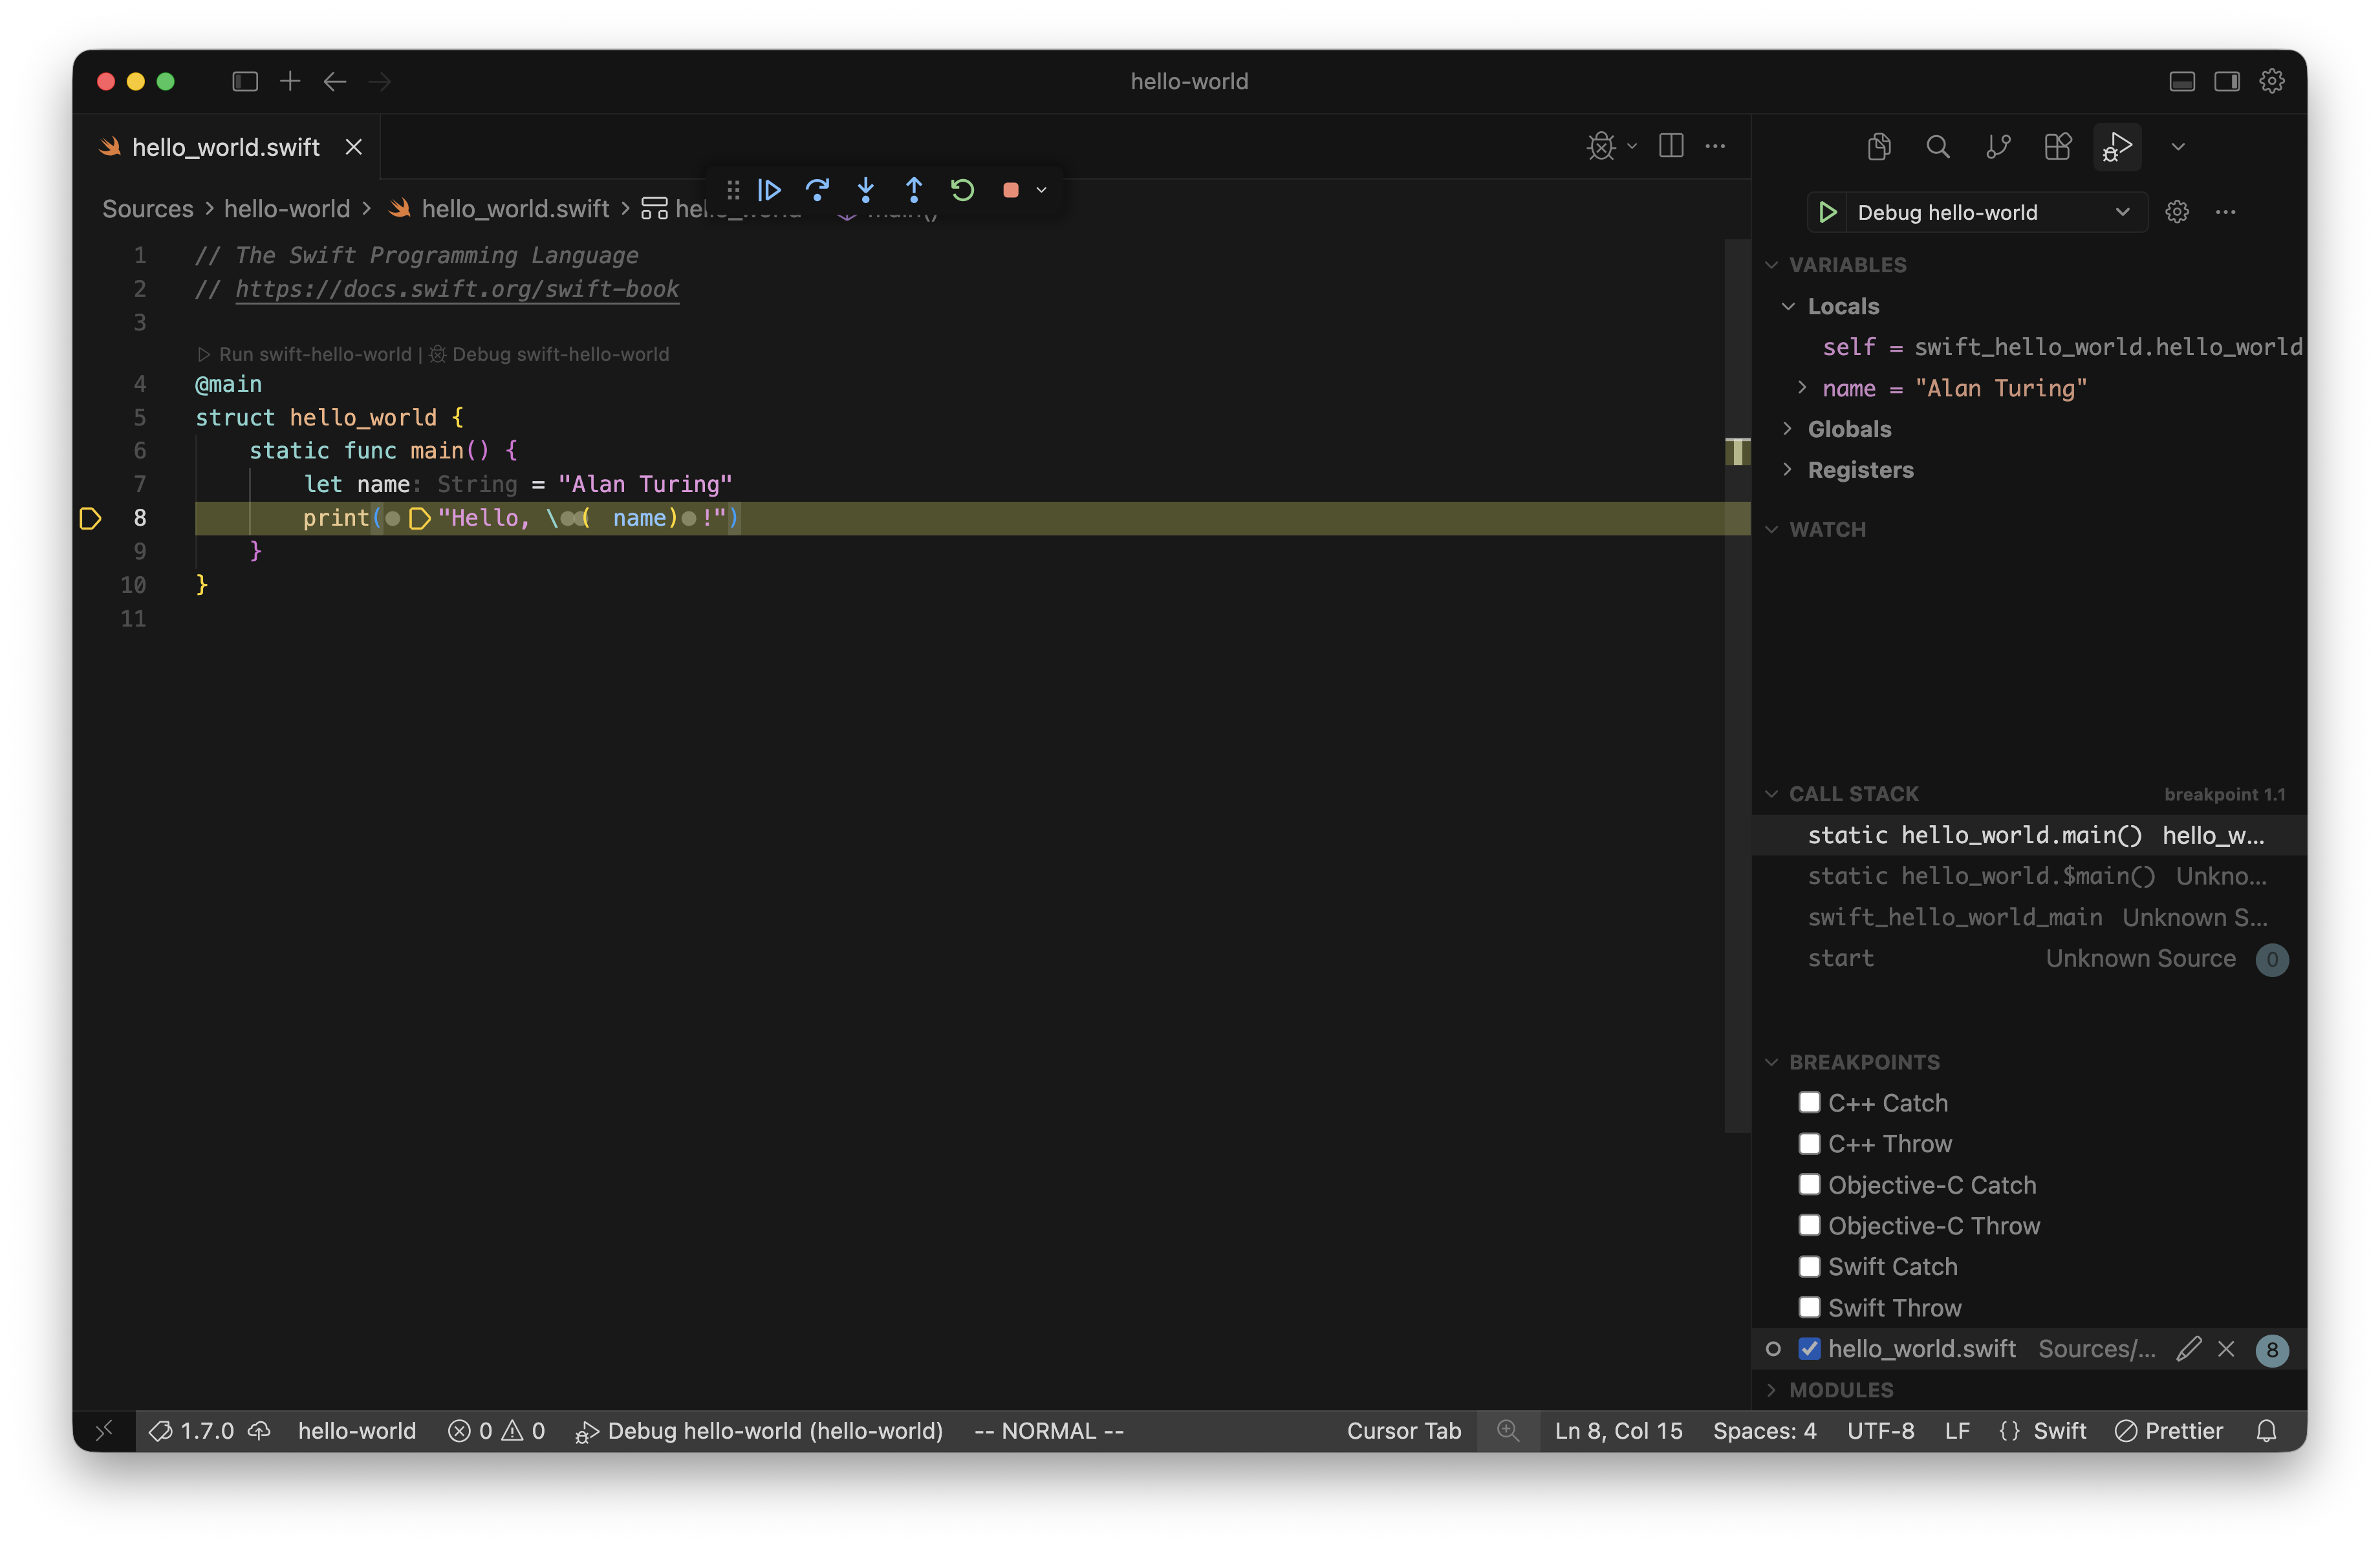
Cursor launches the executable and you can set breakpoints in your Swift code that it will hit as code executes.
The screenshot below shows an example of debugging a Hello World program. It is paused on a breakpoint and you can see that the Debug View shows the values of variables in scope. You can hover over identifiers in the editor to see their variable values:
Testing
The Swift extension automatically renders buttons to run tests. The extension supports XCTest as well as Swift Testing.
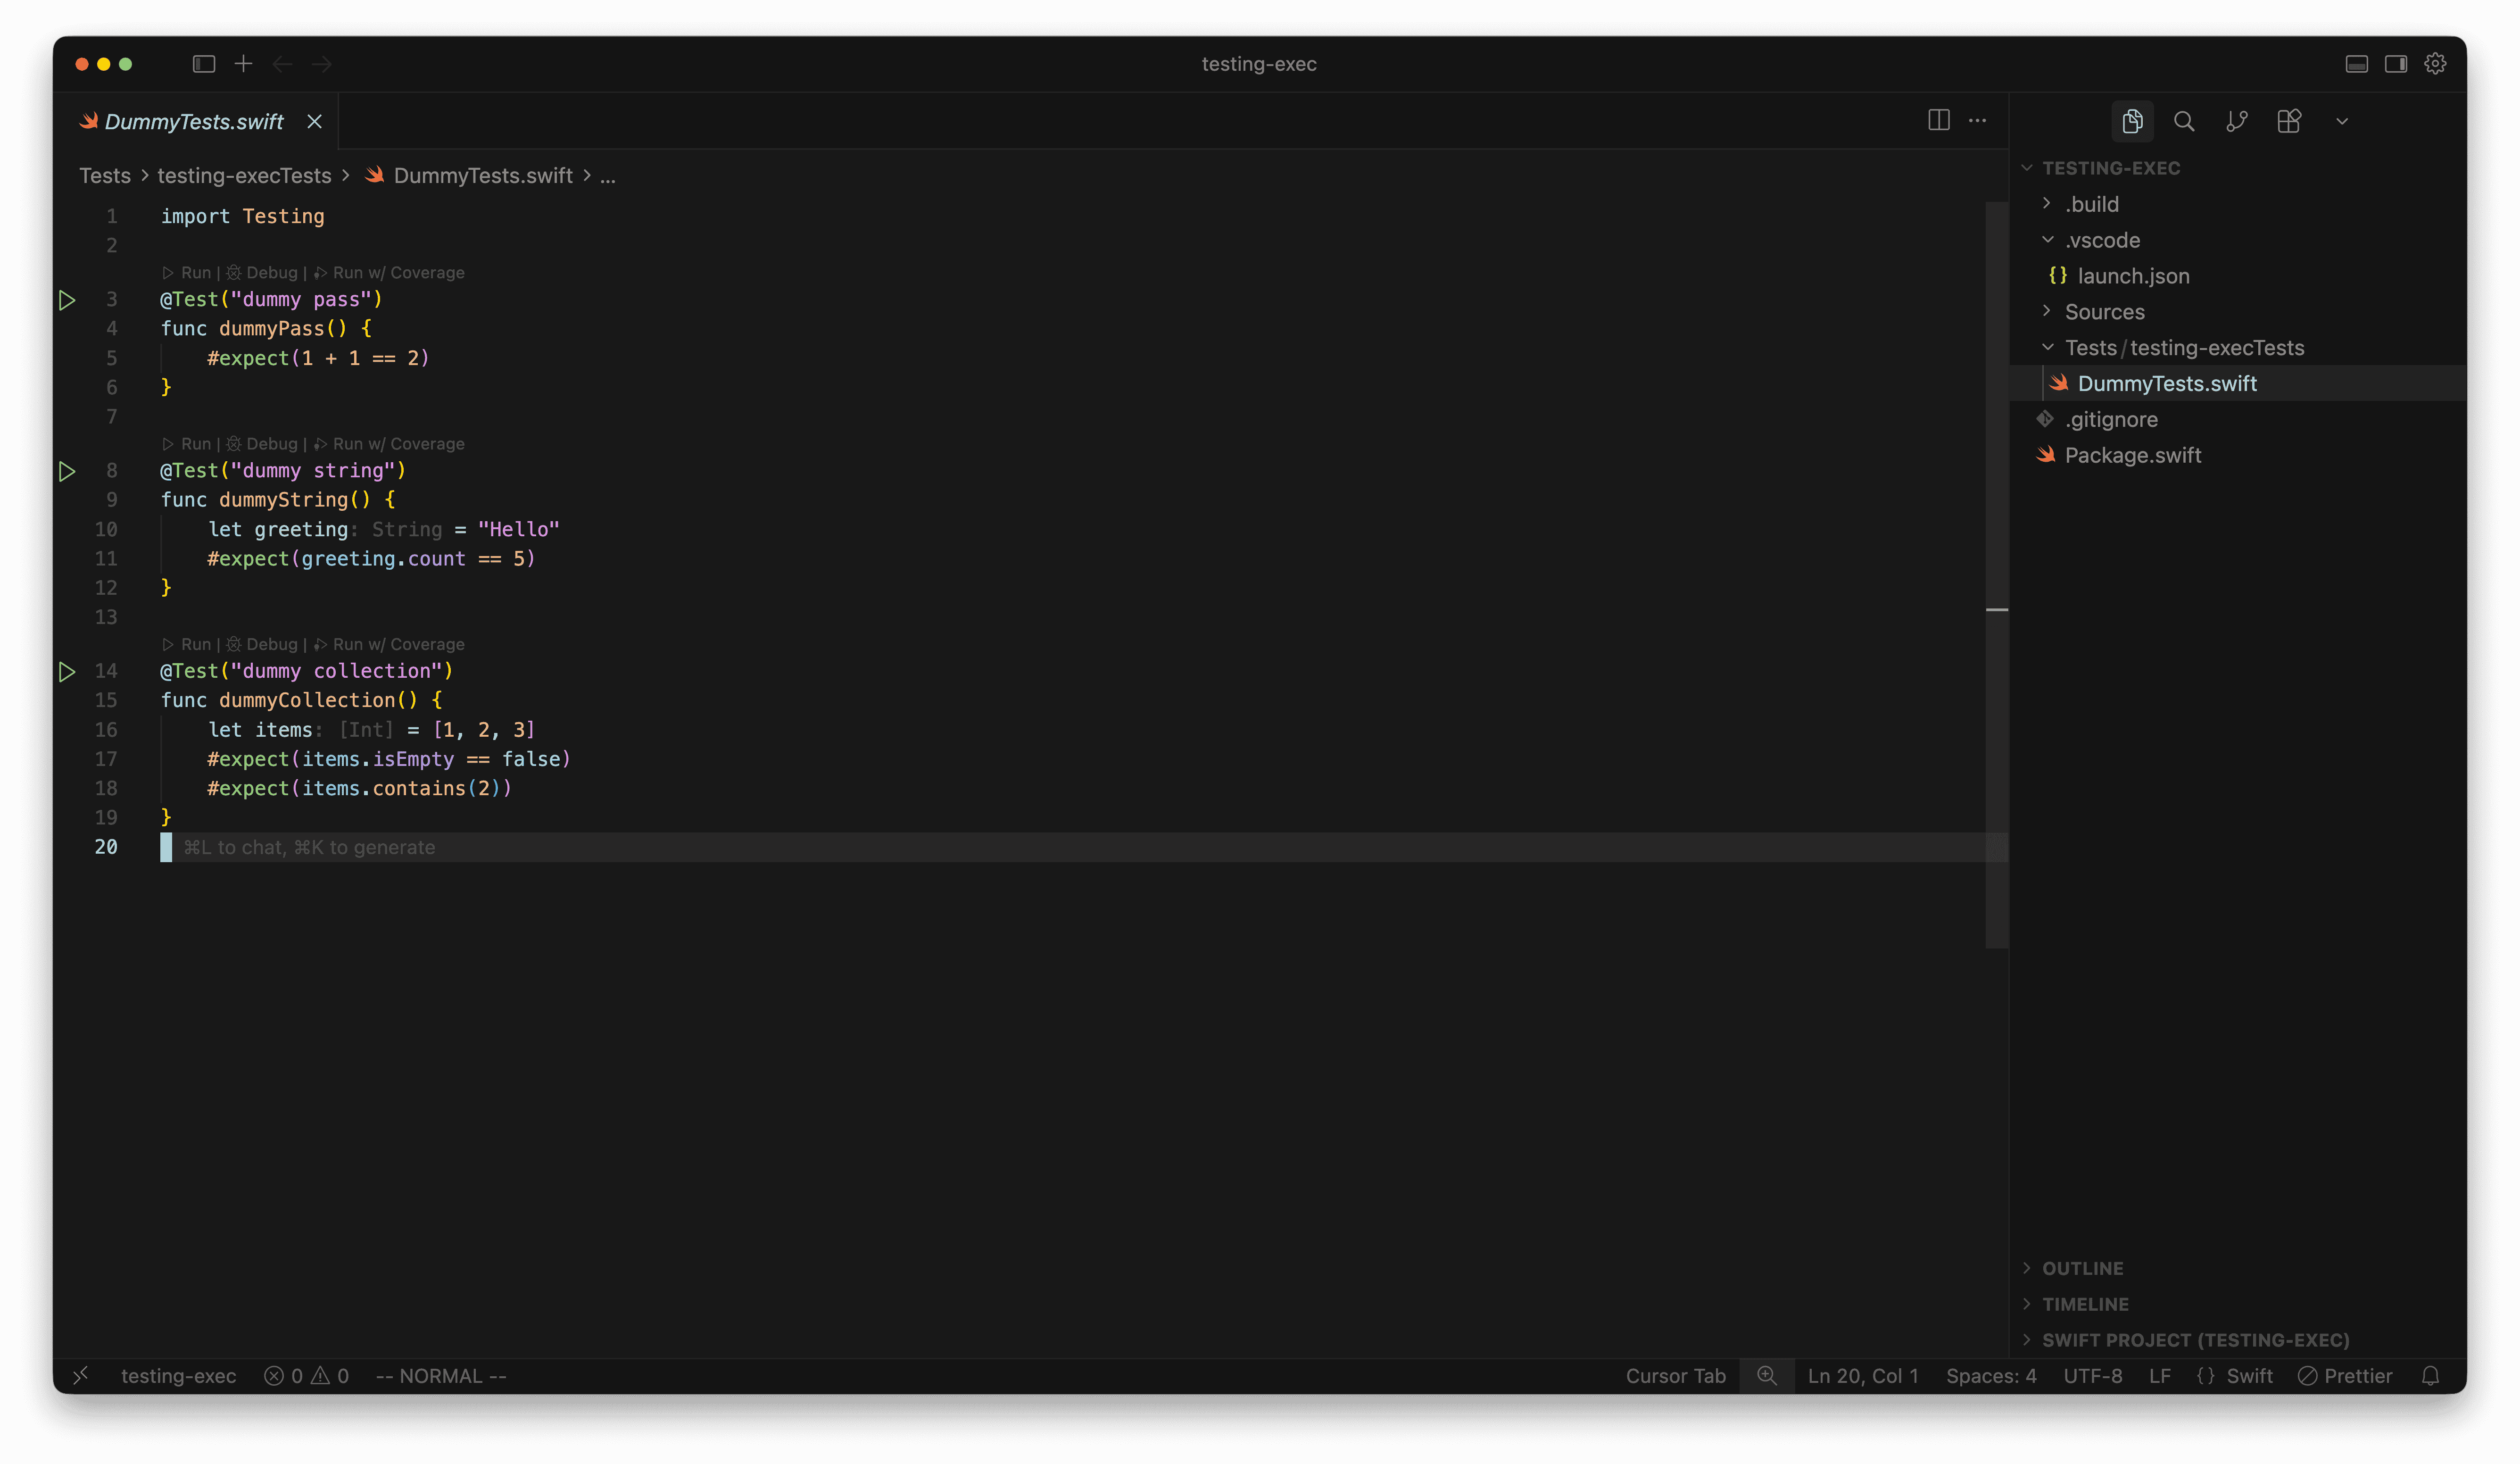
Cursor provides a Test Explorer view in the right sidebar which can be used:
- To navigate to tests
- To run tests
- To Debug tests
As you write tests they are automatically added to the Test Explorer. Open the explorer by selecting the arrow in the top right corner:

To debug a test:
- Set a breakpoint
- Run the test, suite, or entire test target with the
Debug Testprofile.
The Run Test with Coverage profile instruments the code under test and opens a
code coverage report when the test run completes. As you browse covered files,
line numbers that were executed during a test appear green, and those that were
missed appear red. Hovering over a line number shows how many times covered
lines were executed. Line execution counts can be shown or hidden using the
Test: Show Inline Coverage command.
Swift Testing tests annotated with
tags
can be filtered in the Test Explorer using @TestTarget:tagName. You can then
run or debug the filtered list of tests.
The Swift extension does not support running Swift Testing tests in Swift 5.10 or earlier.
Give Context
The Cursor coding agent might not be aware of the nuances of the Swift language, so it’s important to provide context. One way to do this is to create a set of “skills” that conform to the Agent Skills open format. From the agentskills.io home page:
Agent Skills are folders of instructions, scripts, and resources that agents can discover and use to do things more accurately and efficiently.
You can import Agent Skills into a project in Cursor, and the coding agent will reference the content to improve its code.
Install skills.sh
Use skills.sh to add the Agent Skill to Cursor. To install skills.sh:
- Install nvm
- Use
nvmto install node.js:nvm install node.nvminstallsnpmduring the node installation.
Install a Skill
Open the project you want to add a skill to in Cursor, then open the terminal (Ctrl+\`), and run
npx skills add <skill-repo> --skill <name-of-skill>
For example, to install the Swift Concurrency skill, the command would be:
npx skills \
    add https://github.com/avdlee/swift-concurrency-agent-skill \
   --skill swift-concurrency
Once the package installs, you will be prompted to choose an agent. Start typing Cursor to search for the Cursor coding agent.
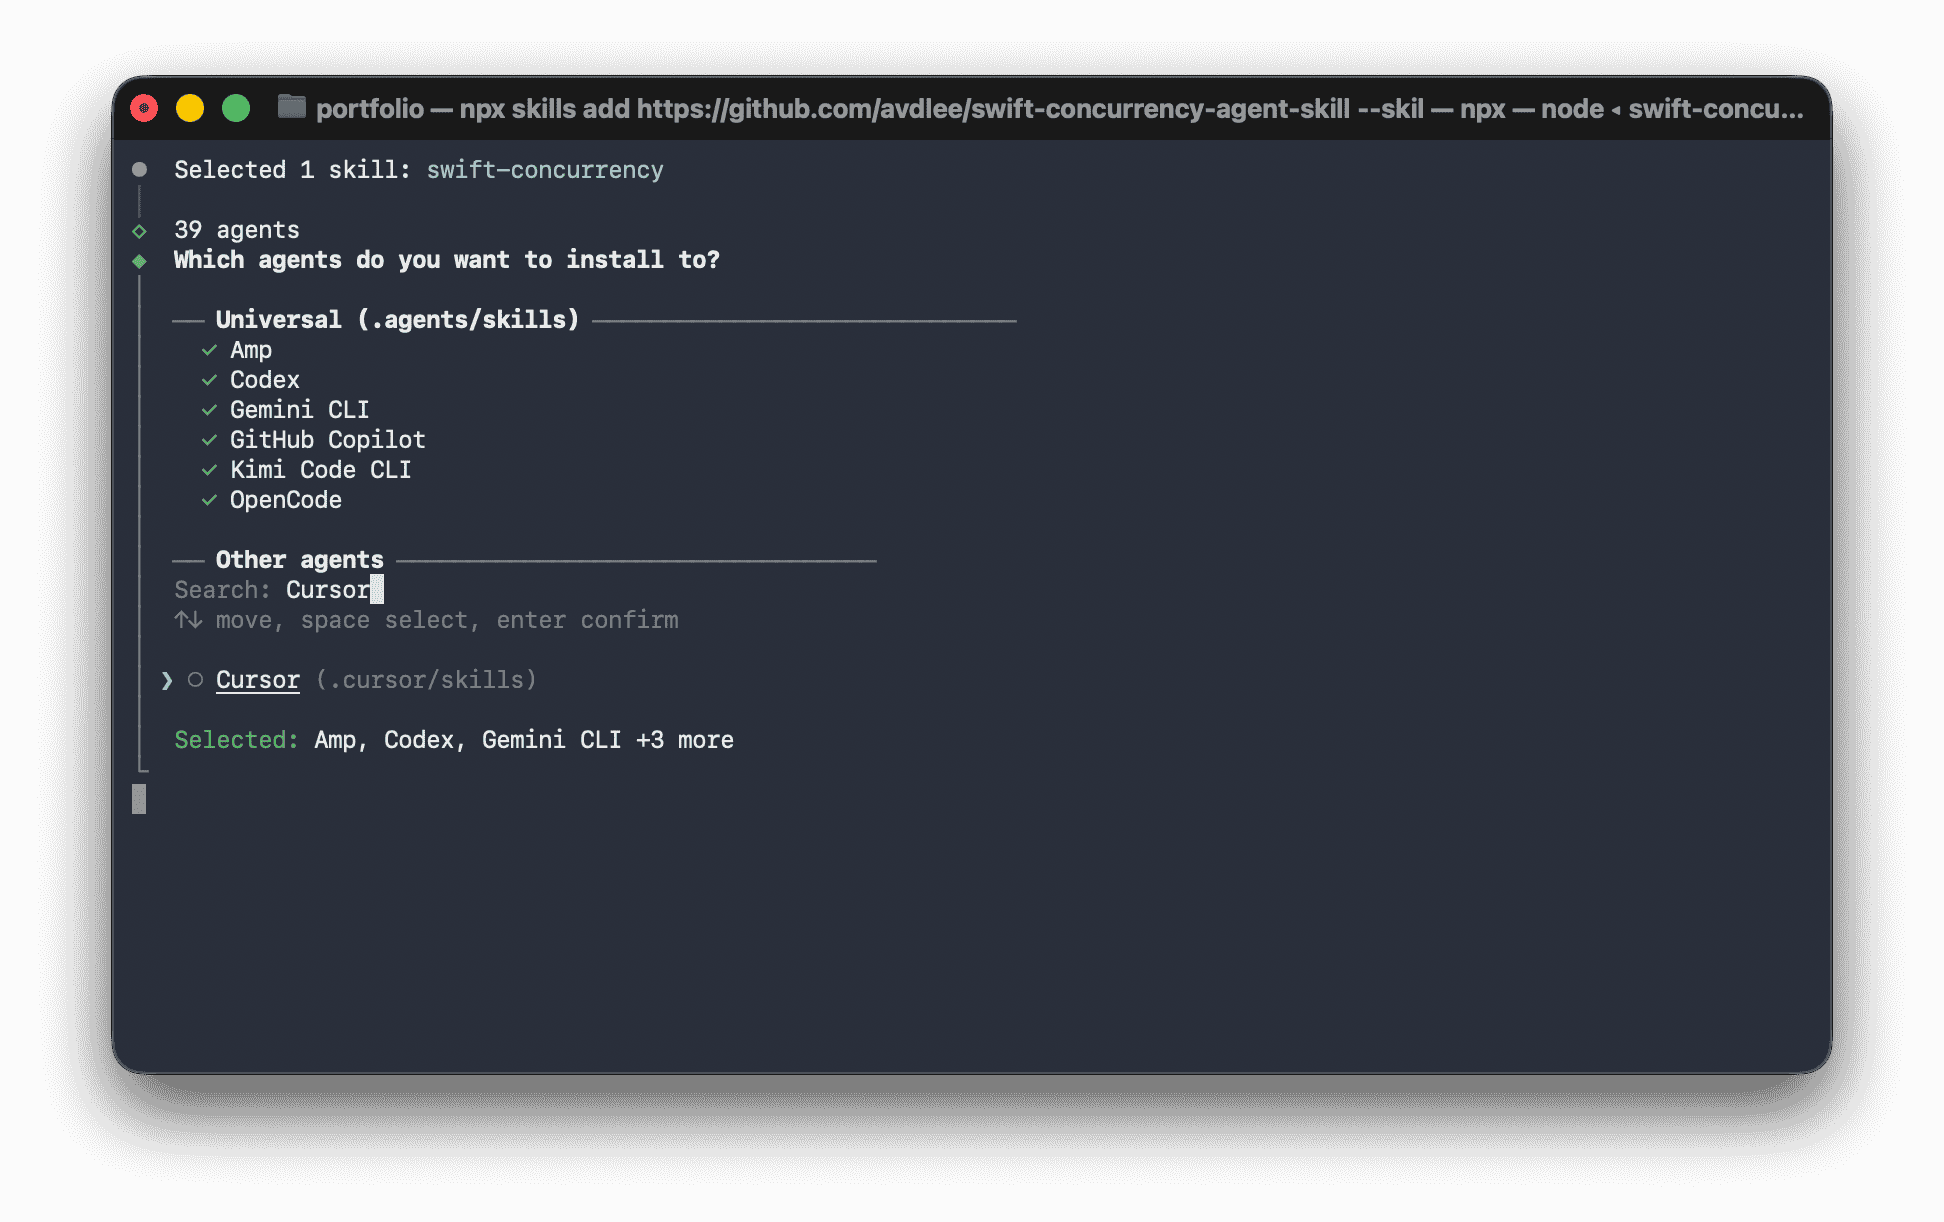
Press the space bar to select Cursor (the circle should turn green).
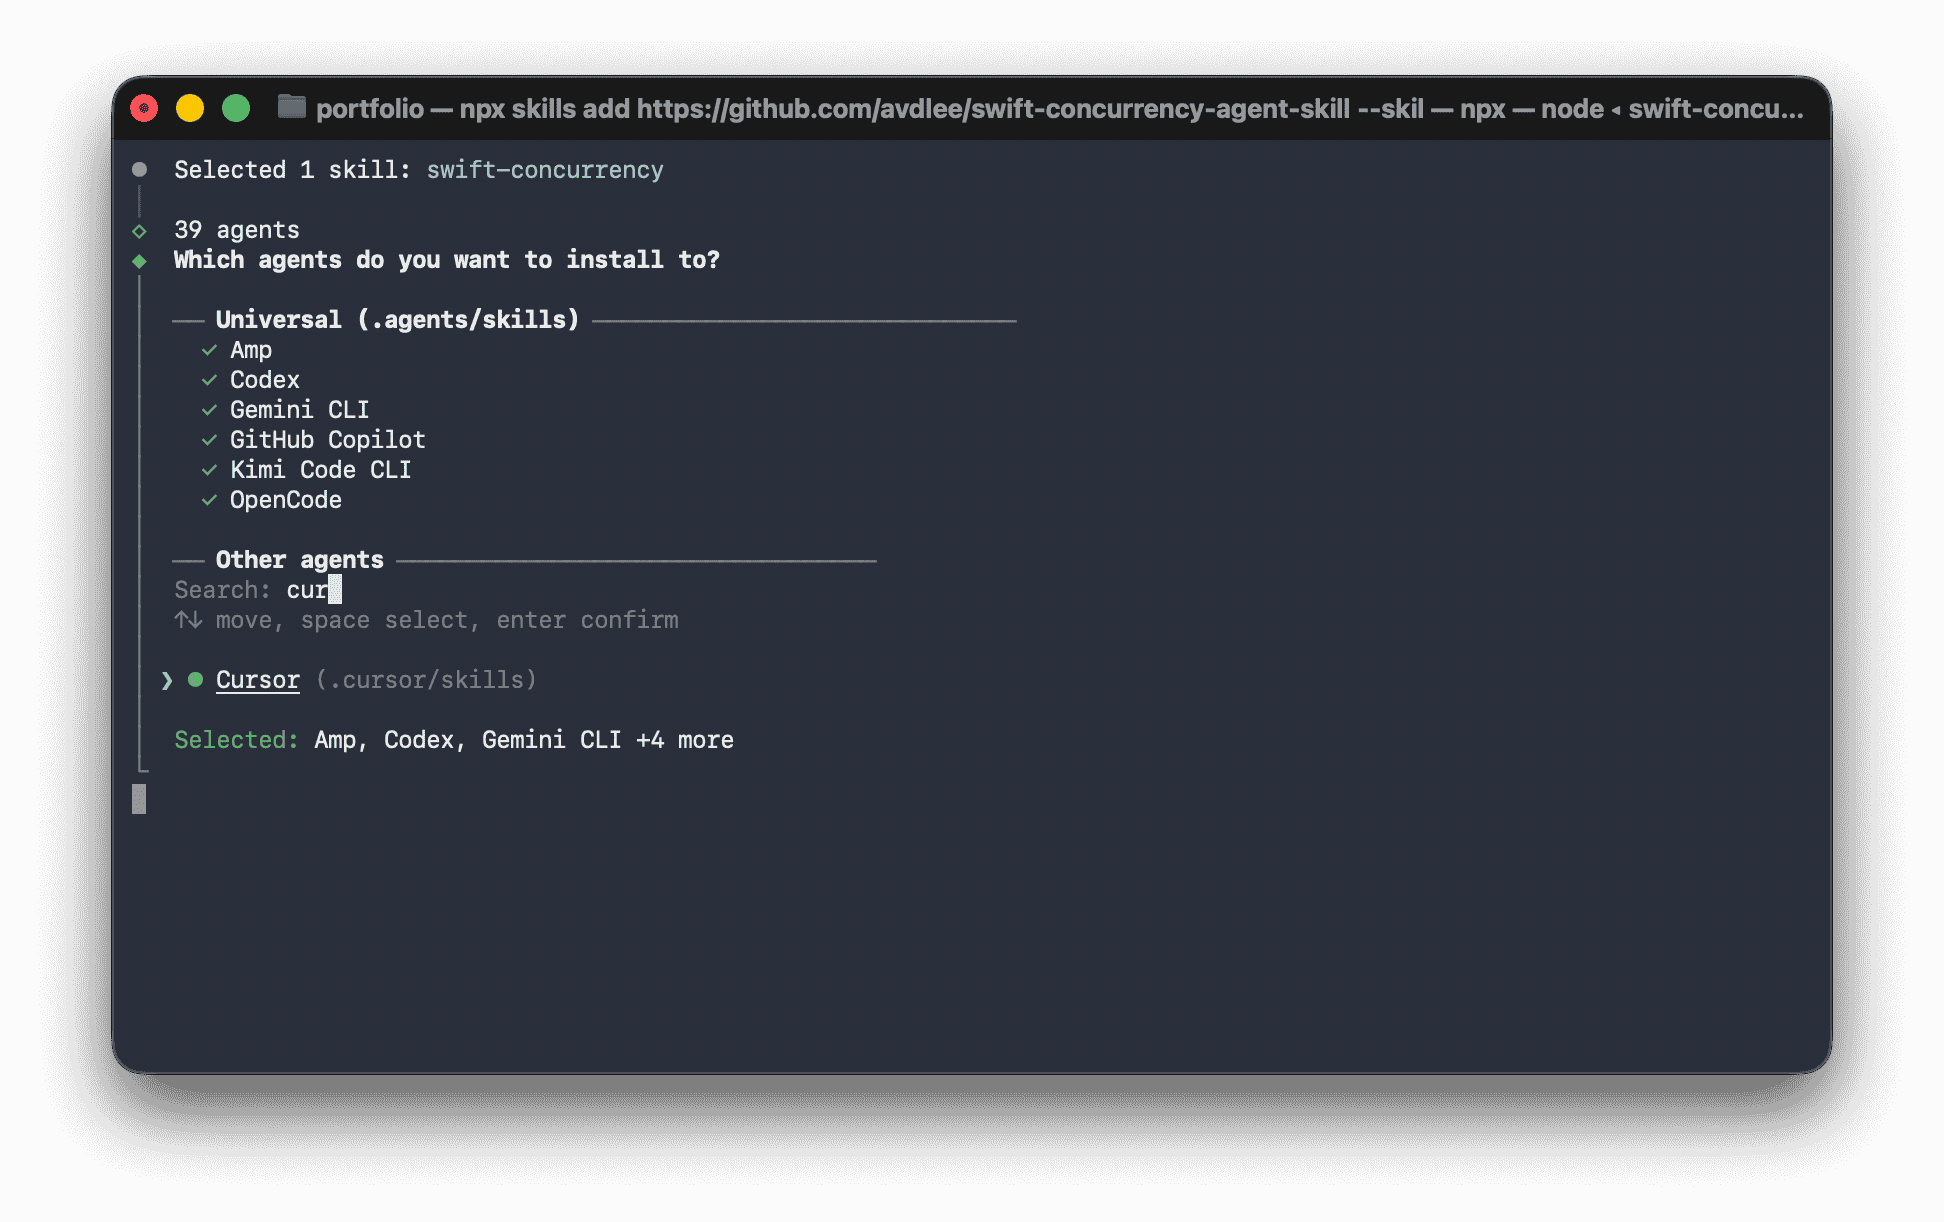
Select “Project” for the installation scope if you want Cursor to use the skill only for the project you are currently in. If you want the skill to be used for every project you open with Cursor, select “Global”.
Select “Symlink” for the installation method. When you edit a skill, Symlink propagates that change to all agents using that skill.
Once the installation is finished, skills.sh will print the location of the skill, and confirm the skill was installed:
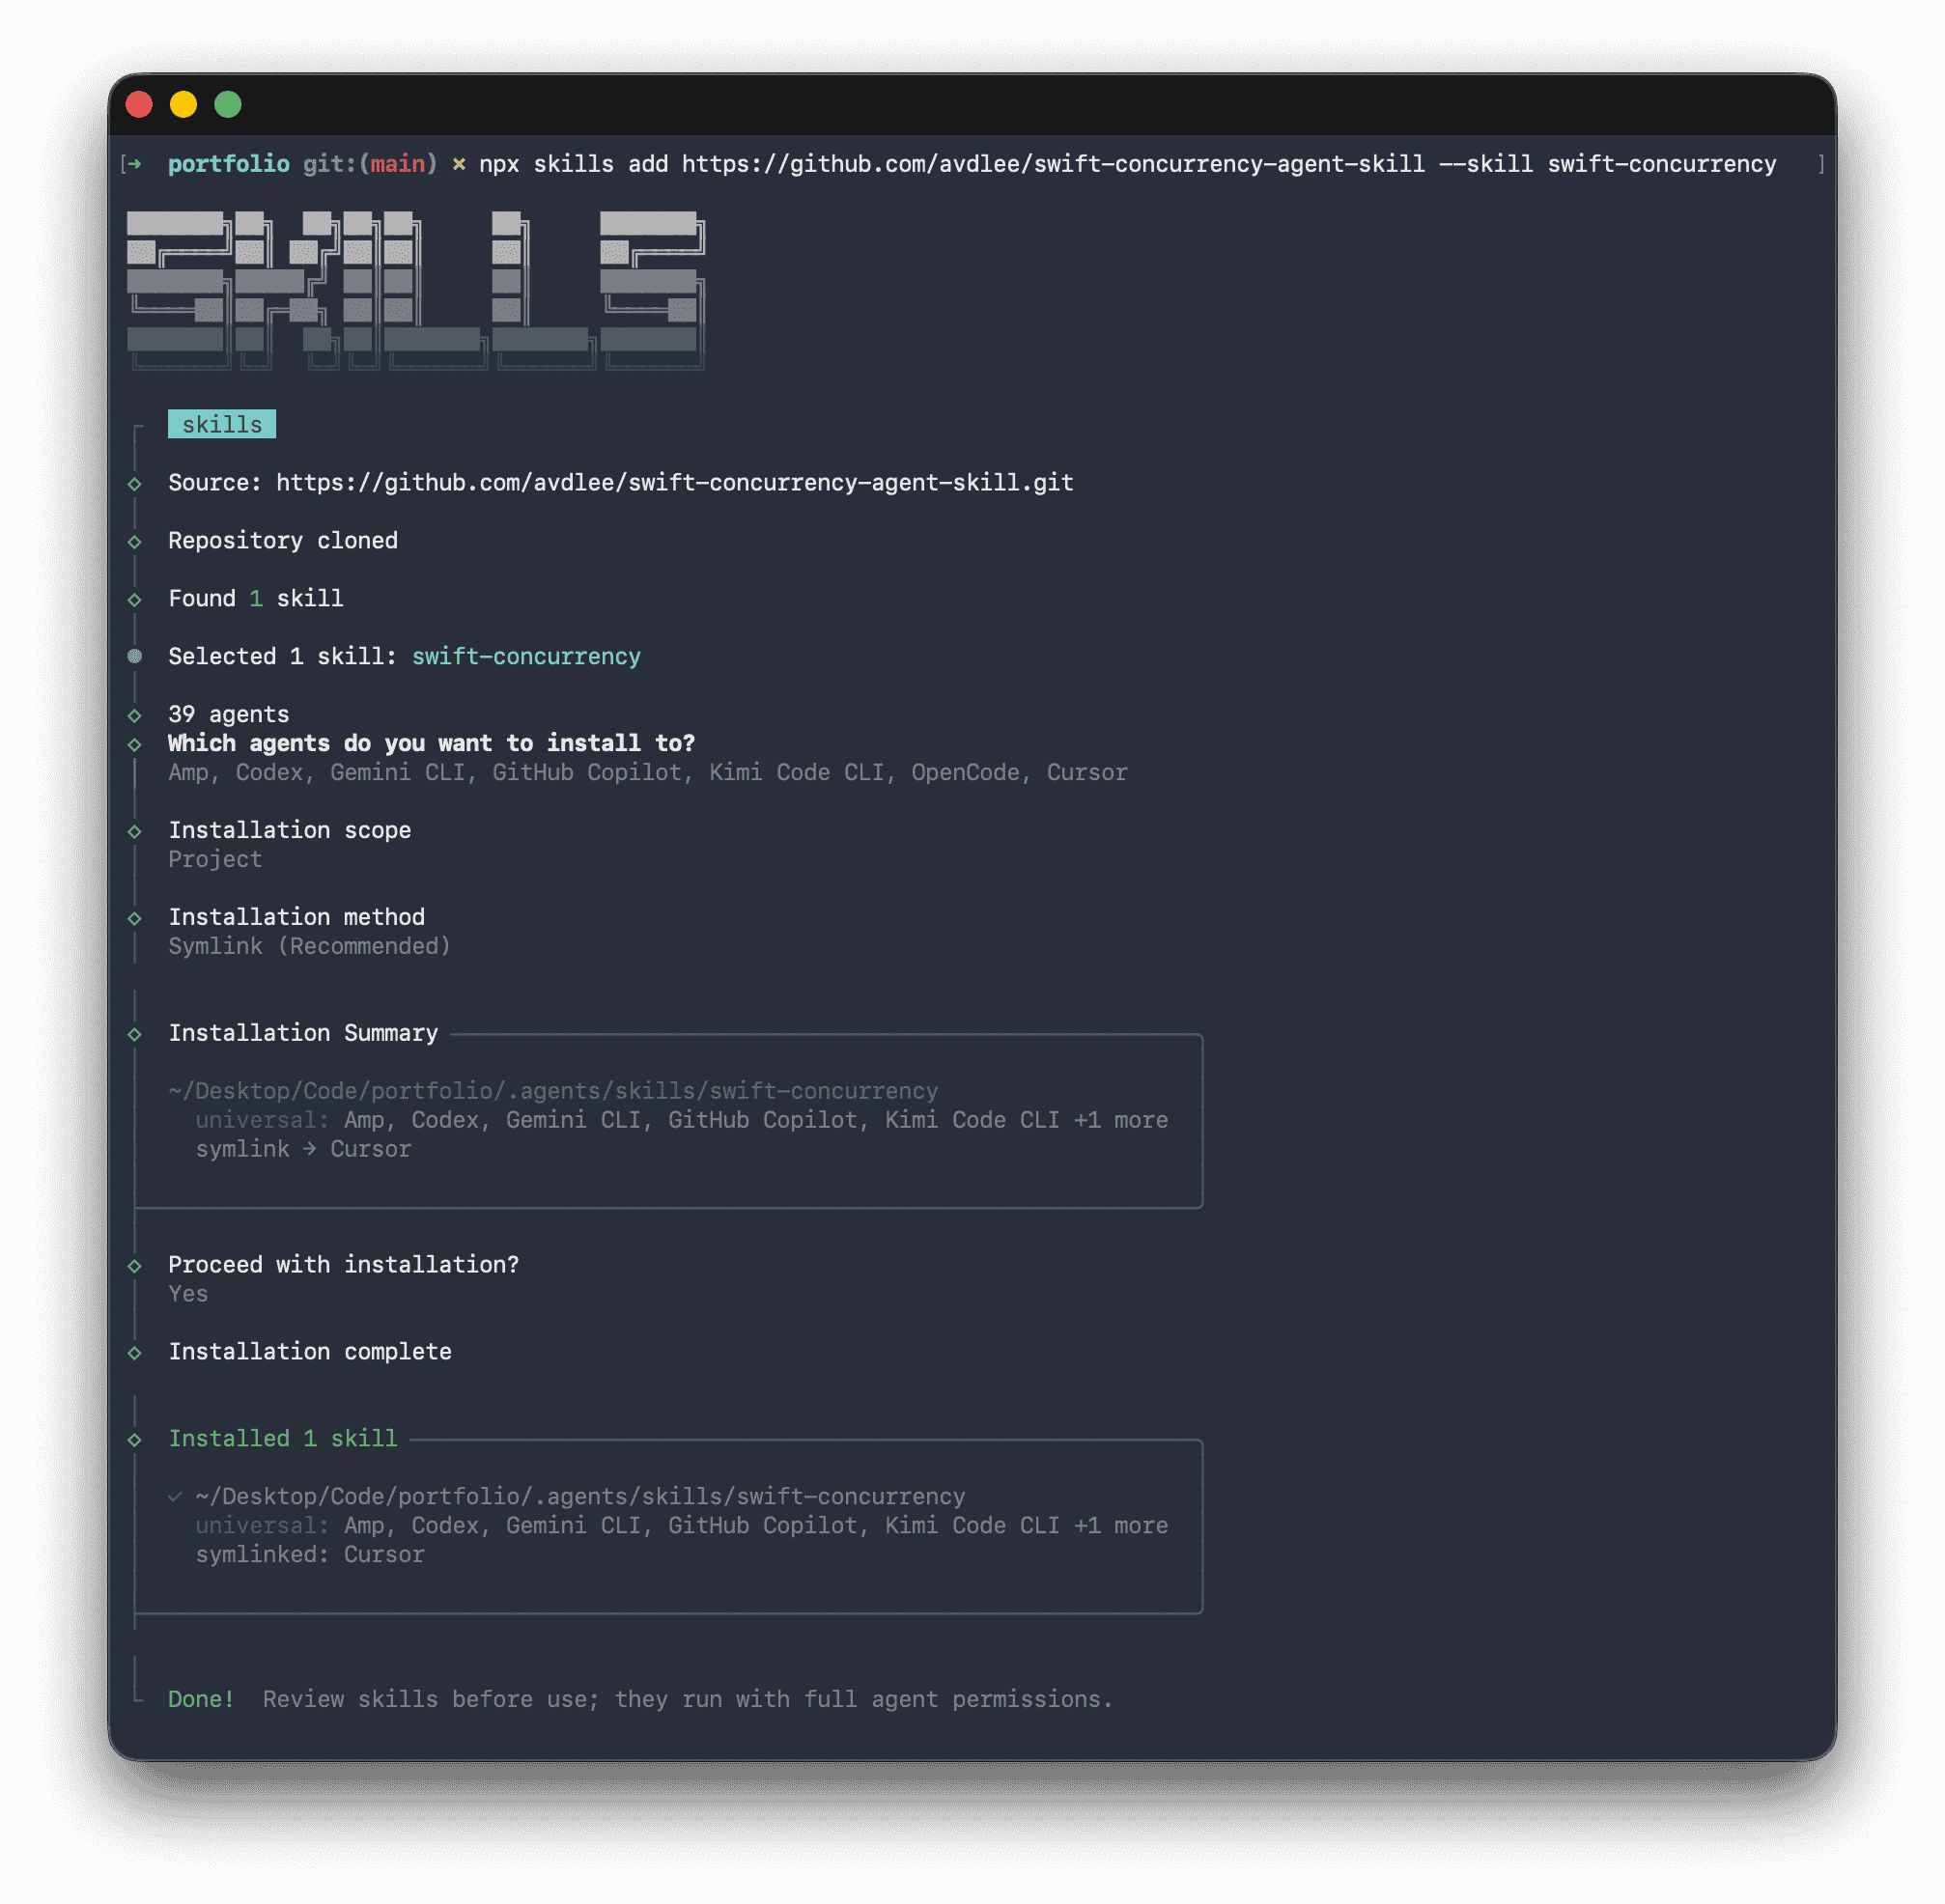
The .agent and .cursor folders should appear in the root of your project’s structure.
Confirm Skill Use
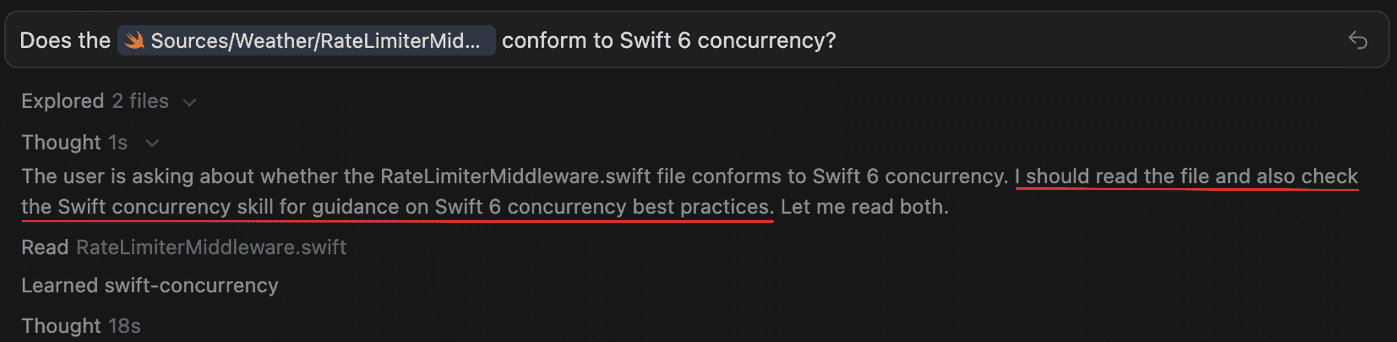
Now the skill has been added to the Cursor project that is currently open (assuming you selected the “Project installation scope”). The agent is presented with available skills and decides when they are relevant based on context. You don’t have to tell the agent to use a skill.
To confirm whether your Cursor coding agent referenced your skill, check the log of the agent’s thought:
Advanced Toolchain Selection
The Swift extension automatically detects your installed Swift toolchain.
However, it also provides a command called Swift: Select Toolchain... which
can be used to select between toolchains if you have multiple installed.
This is an advanced feature used to configure Cursor with a toolchain other
than the default on your machine. It is recommended to use xcode-select on
macOS or swiftly on Linux to switch between toolchains globally.
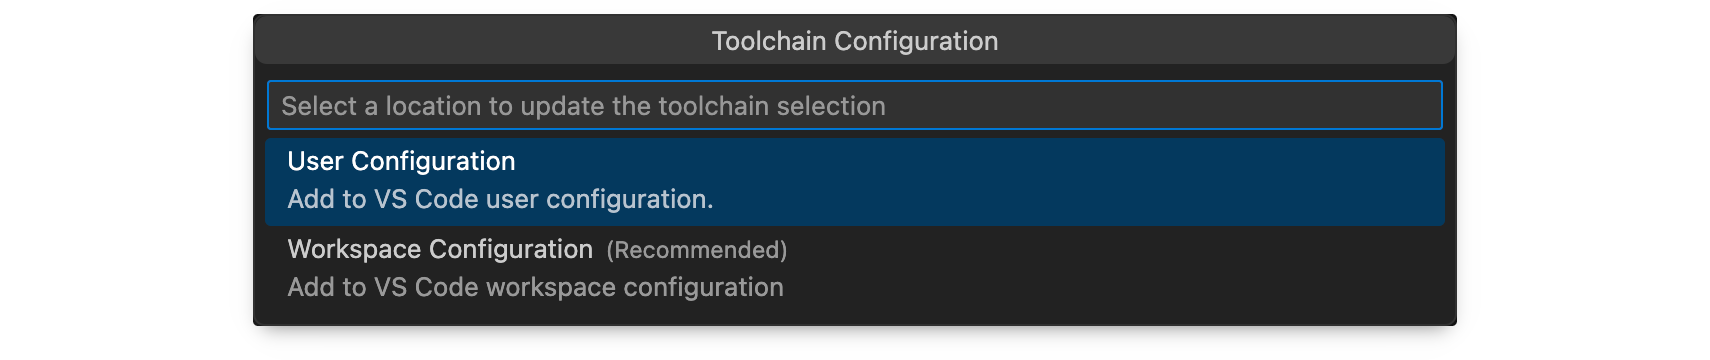
You may be prompted to select where to configure this new path. Your options are to:
- Save it in User Settings
- Save it in Workspace Settings
Keep in mind that Workspace Settings take precedence over User Settings:
The Swift extension will then prompt you to reload the extension in order to pick up the new toolchain. You must do so, otherwise the extension will not function correctly.
Learn More and Contribute
Cursor’s Swift extension is derived from VS Code’s Swift extension. All the docs about the VS Code extension apply to Cursor.
The official documentation for this extension is available on swift.org.
To propose new features, post on the Swift forums in the VS Code Swift Extension category. If you run into something that doesn’t work the way you’d expect, please file an issue in the extension’s GitHub repository.
The project welcomes contributions, including code, tests, and documentation. For more details on how to contribute, please read the contribution guide.